Running registered printed shrink film isn’t as easy as putting the roll of film on your machine and pressing a button. There are many factors to consider. Package appearance, speed, the layout of artwork and graphic design elements, the capabilities of the machines you are running, the specific colors, and air evacuation are all important aspects that demand your attention. In the article below, we will explore the dynamics of running printed shrink film and we will help you to better understand the various elements of the process.
Required Equipment For Running Registered Printed Shrink Film
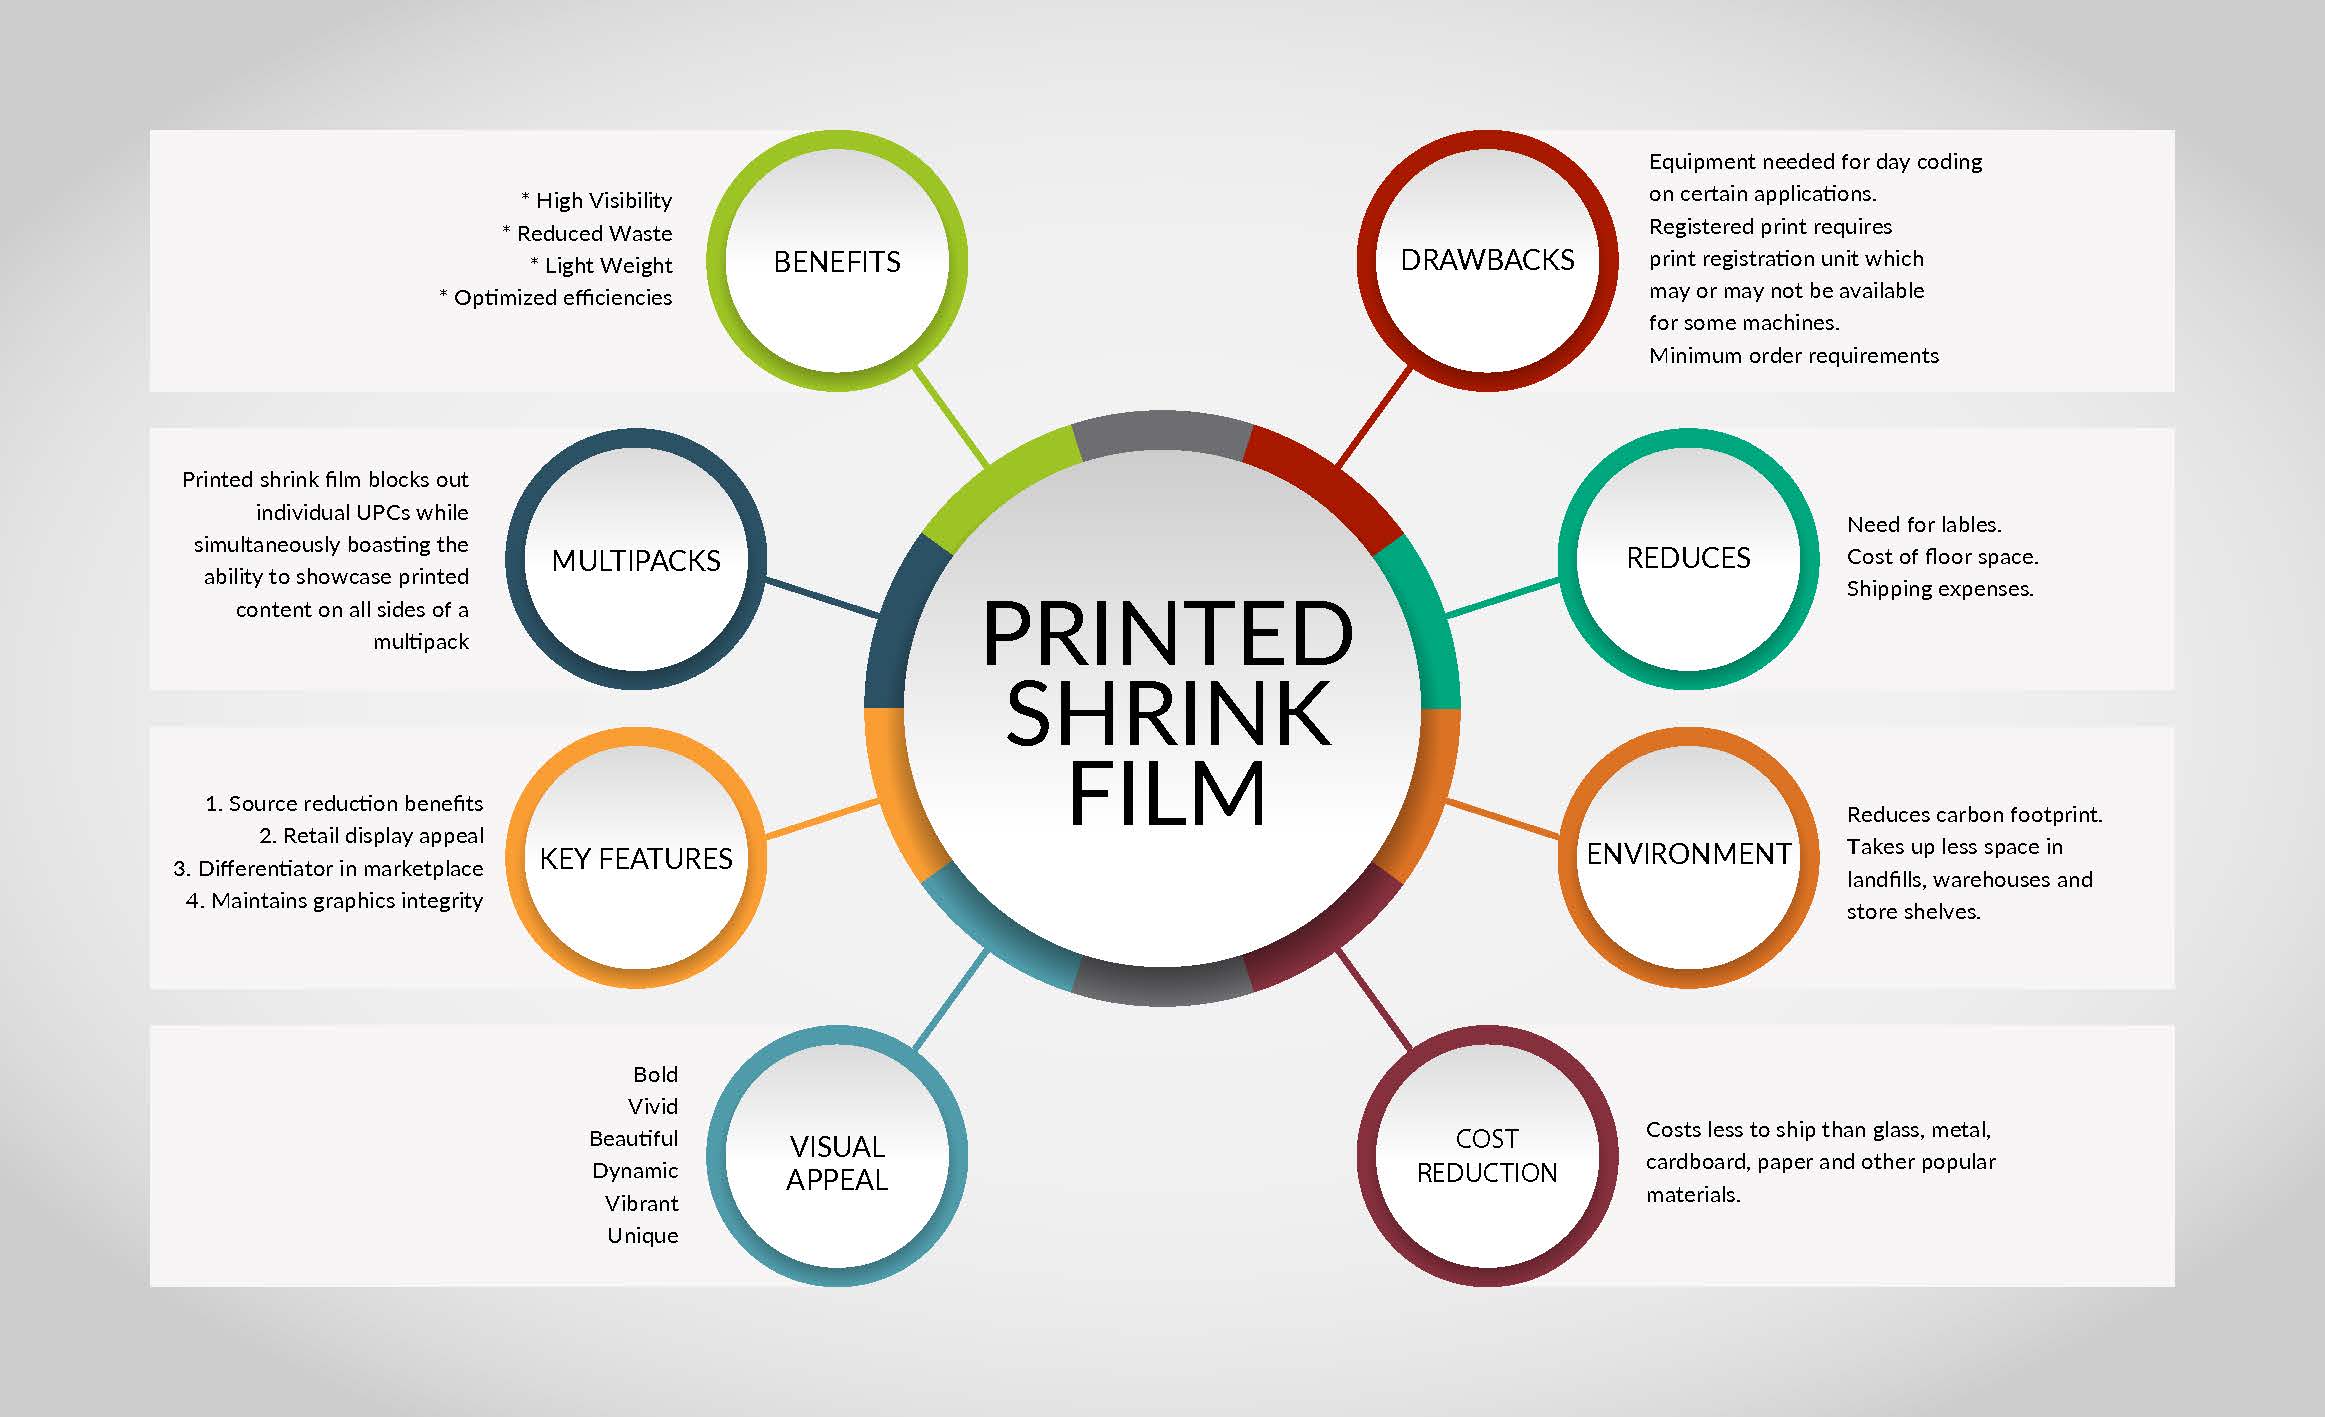
In order to run registered printed shrink film, you will need to have a machine with a print registration unit. If you do not already have one installed, you may be able to have one added to your current equipment. Not all packaging machines can have print registration units retrofit to them. In that case, you will have to upgrade to a brand new machine. When purchasing shrink wrap equipment in general it is wise to consider adding an optional print registration unit, if there is ever a possibility that you might want to run printed shrink film in the future.
Registered Printed Shrink Film For Branding
The appearance of your package is extremely important to the perception of your brand. You want to have a nice crisp package that is legible and eye-catching while also being aware of the environmental impact of the materials you are running. This is accomplished with registered printed shrink film via the combination of enticing colors and graphics that are appealing to the consumer.
Registered printed shrink film offers the ability to print bold and vibrant color/graphic combinations while also offering minimal impact on the environment. With one of the smallest carbon footprints of any packaging material, printed shrink takes up less space in our landfills and results in far less air pollution. This is due to its lightweight and the lower carbon emissions produced during shipping when compared to other materials.
Need Help Choosing The Right Shrink Film?

Packaging Line Dynamics Of Registered Printed Shrink Film
Depending on how fast you need to run in conjunction with the styles of packaging you employ (i.e.: using a multi-pack, side by side in a single file) you will need to figure out how you are going to create the package. Next, you need to consider how you will present it to the wrapper, shrink the registered printed film and get it through the rest of your packaging line as fast as possible.
Creating the best package will require a specialty in-feed unit which may utilize timing screws and gates to correctly lane the product and create the ideal package configuration. Next, you will need to present it to the wrapper in as stable a format as you possibly can. The wrapper must be equipped with a print registration option which typically uses a photo eye to detect the eye mark. The photo eye then alerts the wrapper when to make the seal.
Photo eyes must be trained to read the density of the eye mark in order to be effective with the wrapper. You will want to avoid sealing in printed areas as this will almost certainly result in a very weak seal or no seal at all. It is ill-advised to use surface printed film as this will result in a maintenance nightmare as the ink builds up on your seal bar. When this happens, your machine will require extremely frequent cleanings. Some inks will actually deteriorate the seal bar. In this respect, it is highly recommended to use a hard coating to extend the life of this particular part.
The Art Of Running Printed Shrink Film
Like so many things in life, running printed shrink film is part science and part art. The science side is based on theoretical models, and the art side is based on experience. There are several factors that contribute to the success (or failure) of running printed shrink film.
- PREPARATION: Your actual graphic design is critically important to your success. Your design must deliver the message that you want delivered, while assuring that the actual packaging process goes smoothly.
- SHRINK FILM DISTORTION: When shrink film runs through a shrink tunnel, it does not shrink evenly, but rather shrinks in different ways based on where it is located on the overall package. No one ever knows this or sees this when running unprinted shrink film. Understanding the actual distortion is a critical element in the graphics design, as the graphic design must be pre-distorted to assure the desired outcome.
- INK COVERAGE:
- Number of colors: Printing on clear film is not like printing on paper or a board substrate which automatically provides one starting color for free. Laying down a layer of white ink prior to applying your colors is a common practice.
- The greater the amount of ink coverage, the greater the chance that the printer will need to run their press at a slower speed. The desired outcome can be achieved, but the film cost could be slightly higher.
- Ink density is an important consideration relative to blocking individual UPC codes (see below).
- INK LOCATION:
- When packaging a multipack, it is important that the ink cover the individual UPC codes on the individual packages.
- It is difficult to form the heat seal required for each package if the seal bar is forced to seal through ink.
- Avoiding ink coverage on bridged areas (where film does not actually touch the product) will reduce distortion.
- FILM SNAP BACK:
- When shrink film is printed, it gets stretched through the printing press. The desired “cut-off” length, or “repeat” must be factored into the design, to allow for the “snap back” that occurs after the film has been printed and prior to being wound onto the finished roll.
- PRE-PRODUCTION TESTING: The actual performance of shrink film varies greatly, based on several factors. One of the most important is YOUR actual shrink tunnel. Therefore, prior to producing production orders of printed shrink film, several steps are required.
- Grid Pattern: One approach is to run a roll of shrink film with a printed, single color, grid pattern with your product on your actual equipment. This will allow an initial understanding of the distortion to be expected.
- Composite Roll: A one-color greyscale roll, printed with your actual graphics should be run on your equipment with your product. This provides the best guidance for creating pre-distorted graphics for your product.
- PRODUCTION CONSIDERATIONS:
- The colors you select will impact how the film actually shrinks. Dark colors absorb heat, while light colors reflect heat. Adjustments to your shrink tunnel settings will be required for different colors, especially if you have designs with different colors.
- Package appearance is enhanced when the shrink film properly balloons in the shrink tunnel, prior to actually shrinking. Proper placement of perforation holes on the package will assure proper ballooning.
- Your shrink tunnel will determine the appearance of your final packaging. A double chamber tunnel will provide the best results. A double chamber tunnel will also have separate airflow controls and separate temperature controllers.
- EQUIPMENT CONSIDERATIONS:
- Your shrink tunnel will determine the final appearance of the package.
- Your wrapper will determine your line speeds (assuming the tunnel can keep up.)
- Options for new equipment: If you are not getting the appearance that you want, you might have the option of upgrading just your shrink tunnel, without necessarily having to replace your wrapper. With high-speed automatic lines, the shrink tunnel is less expensive than the wrapper.
- FILM SPECIFICATIONS: Traditionally, shrink film is wound onto 3” I.D. cores. It is best to specify that the inbound film to the printer and the finished rolls of printed film be wound on 6” I.D. cores. When you print on film, the ink adds thickness to the film in the areas that are printed. To avoid stretching the film, using 6” cores will allow for fewer revolutions of film on the roll and less stretching for the same footage. Using a 6” core only will add approximately an inch in the overall finished diameter when compared to a 3” core.
- PRINTER SELECTION: LAST BUT EXTREMELY IMPORTANT
- There is a lot of printed film used… think trays of bottled waters. Most of these films are polyethylene and are for applications where graphics are important but have fewer demanding specifications.
- Print treatment vs. primer coat: Ink does not like to stick to shrink film. Historically, in order to overcome this, film was pre-treated with a corona treatment. This process has many disadvantages. An improved process is to provide a primer coat during the printing process. Think of this as an additional color, that you never see. Make sure that your prospective printer is experienced with this.
- If you are considering printed shrink film, make sure that your printer has significant experience running printed shrink film. All printers claim that they can run shrink film, but few can. Light gauge printed shrink film is the wave of the future. Be sure that your printer can truly do this.
While the above information shows that running registered printed shrink film is in fact a rather complicated process, it is very doable. In order to properly implement the running of registered printed shrink film on your packaging line, it is extremely important to work with a local packaging expert throughout every step of the process. This will ensure that everything is done correctly and will produce the desired results.
Conclusion
When choosing a type of shrink film to package your products in, it is important to do research ahead of time to find out which film is the best fit for your products. In addition to making sure that you are correctly employing all the advice above, it is also very important to make sure that you are running the correct gauge of shrink film regardless of whether you are using clear or printed versions.
Using the wrong speed, heat, gauge, and ink for your shrink films are just a few of the serious mistakes that can lead to an excess of wasted time and money. Be sure to reach out to your local packaging professionals and ask for an analysis of your materials and your machinery to see if there are any adjustments that can be made. Sometimes something as simple as reducing the gauge of your film or the heat of your shrink tunnel can result in huge cost savings.